
| home | articles | briefs | classifieds | flimsies | interchange |
|
|
||||||
|
|||||||
 |
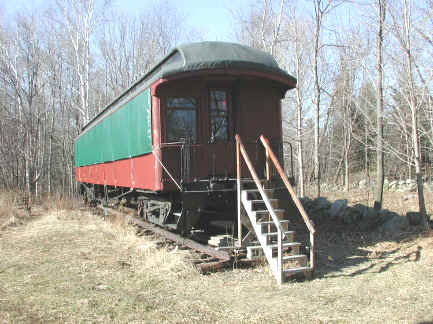
RyPN Articles May 31, 2004 previous article ~ return to articles index ~ next article The Continuing Saga of ex-Boston & Maine Coach No. 1246 (Part VI)
Well it's that time of year again; to summarize the year past before I forget it all. Things are going well enough with most of the really important issues dealt with, but with an increasing sense of the things that time is working against even thought they're part of the rebuild. I'm in the thirteenth year so the things done early are coming up to at least middle age. Last year I told you of my accidental good fortune in locating two original style dry hoppers, items I never thought I could find. The original specs called for Sherburne and these are American Standard, but they are certainly in the spirit and style of the original. At the beginning of the 2003 season, they were safely in my shed waiting for the finished floor in the saloons. It's hard to imagine how dirty they were and how hard it was to make an impression on them even with modern cleansers. But although I was thrilled to have them, I had to put them aside for later. Early in the year, it became obvious that we were going to undergo two (count them) daughters' weddings. One of those weddings was going to be at home and that 1246 was definitely going to be a point of interest for wedding party and guests alike. This fact had immediate consequences for me as soon as the weather cleared and warmed enough to get started. I had never done anything with the platforms and railings at each end. Although I had very early on rebuilt and painted the steps, I had spilled paint remover on them in the course of stripping the paint from the ends so they now looked rough at best. A lot of the old revenue service paint had weathered off over the years in the more exposed locations although there was plenty left. I don't know how many coats were there, but there were plenty and it had turned gummy and cracked with time. The only thing that worked was heat. That was fine for the areas far from any wood, like the railings, but more difficult as I approached the platform near the wood body. I was able to use a hand held propane torch successfully on the safe areas and since the grass was soaking wet, the flaming gobs of paint that fell there were no problem. On the more sensitive areas, I used my heat gun on low heat and that worked OK. The paint wouldn't come off as neatly as over wood, but sort of melted off and reattached in a thin layer. This actually was not as bad as it sounded since it gave me a '"free" first coat for when I repainted. I was disappointed at how long it took to strip the paint off considering the small square area involved. It was like working on a picket fence, all kinds of nooks and crannies so you didn't make much forward progress. Repainting was as slow for the same reason. Give me a nice flat surface to work on anytime. Repainting the steps seemed like a picnic in comparison. In addition to that project, I needed to build a set of stairs up to platform. Why I hadn't done it years earlier is still a mystery. Ever since I first rebuilt the steps in the first year, I had been laboriously swinging myself up from the ground which made it really hard for anyone to visit and really hard to carry any tools aboard. Perhaps I just didn't want to devote the time to it or didn't have confidence in my stair laying out abilities. Anyway it was now obvious that it would have to be done. Stairs aren't something you just knock together. There's a sort of science to it. The combined total of tread and riser has to be to a certain figure which my home handy man book doesn't give, but which I estimated at about fourteen inches. The angle of the stringers have to be such the stair risers are all the same height after the treads are nailed. This means you have to know the vertical rise and plan ahead so you don't have a half step at top or bottom. Calculating the vertical rise to uneven ground a number of feet out from the platform is no easy trick.
I found that the easiest way to cut the notches in the stringers would be to make my angle forty-five degrees and did so for this reason. Only after the whole thing was completed, did it seem that this was a little steep. All in all, the project was a success with this slight exception. At last I could run up and down and actually carry stuff around. This was all to the good since I had a lot of cleaning out to do after years of accumulation all of which had to come out before I got down to serious varnishing. Varnishing is a whole subject in itself. There's a learning curve which only making the bonehead mistakes can overcome. No wonder car interiors are so often painted. It's easier to do a good job and the interior is a lot brighter. No doubt both those reasons contributed to the B&M's decision to overpaint sometime while the car was in revenue service. I've never much cared for the look of most of the cars, and even roadside diners, I've seen with a simple varnish over natural mahogany. The color comes out between butterscotch and plain brown. Just doesn't seem right to me. The builder's photos, although in black and white, seem to show a darker shade than that. When taking off the many layers of paint, I could get a glimpse of a deep rich reddish shade that I really liked and wanted to replicate. Mahogany stains typically are described as red or brown. The browns are just that and are attractive in their own way, but are too dark. The reds I tried gave the same color as the browns until I found a water soluble wood stain that in powdered form was a bright red. It turned red brown in water and gave me the shade I wanted. I would have preferred an oil based stain, but.... The original Pullman specs didn't help much. There is no mention of staining, although filling and varnishing are called for. This is just a case of going on one's own best judgment and letting the critics, if there are any, have their say later. Mahogany is an open grained wood with a lot open pores that would never fill properly if finish were applied directly. To remedy that, painters years ago devised a product that basically is a fine silt suspended in an oily vehicle. If applied and rubbed with a cloth, usually burlap, while still soft, the pores fill and the varnish goes on smoothly. You can combine staining and filling by tinting the filler with the color you want. My problem, I thought, was that the stain was water soluble and the filler was oil based. I'm not sure now that it's done whether that would have been a problem or not. Anyway, I elected to make two steps out of it instead of one. I elected for most of the job to stain first and fill second. That worked out fine in most cases, but not always for the following reason: the filler in it's normal state is a grayish white. This leaves a gray film on the work which has to be sanded/steel-wooled off, but still there is always some left. Applying a coat of varnish will take care of most of this. I don't know the physics of light refraction, but it works. (imagine what happens at a wet T-shirt contest, the T-shirt sort of disappears when wet) But if you've left the filler a little bit thick, it won't completely disappear and you can't tell in advance where that will be. The solution for me was to reverse the order, fill first and then stain. The silt would take on the color of the stain and you'd never see it Now you can see why the process took a while. In fact it drives home the fact that skilled labor in 1907 was very cheap. How could Pullman have spent so much time and effort for so many ordinary day coaches and charged so little for them? Hmmm. The original specs called for two coats of varnish over the filled wood, but I found that three looked enough nicer to justify the extra effort. Of course there's sanding between coats and a final rub out with pumice or rottenstone to give an even " dead" surface. No wonder most of the summer was taken up this way. However, varnishing was not the only way I spent the summer. There was also the matter of the corner post. For some reason on wooden coaches, the corner posts always take a beating. These are the large quarter round pieces at each corner that transition the sides to the ends. The ones I've seen closely, are ash as are the window sills and window trim. Not the best of woods for rot resistance, but acceptable if maintained. Rot damage forms at the lower edges of the car first and these corner posts were no exception. It wasn't helpful that they had been pierced for large wood screws during construction and plugged. Two of the four seemed solid enough, but two needed some attention. In fact, I could and did, inadvertently, put my finger through one of them when looking it over. Making a quarter round of this size, 4 or 4 1/2 inch radius is no easy thing and is compounded by how long it must be. Surely the originals were glued up in quarters, perhaps with paper between for easy disassembly and turned on a large, long wood lathe. Not having such a tool, which would far exceed the usual home wood lathe, I had to create what I needed by hand. I had a good supply of ash, both thick enough and long enough for the purpose. I was also lucky not to need a length longer than about 18 inches. If I had to replace the entire piece of 7-8 feet, the task would have been much, much harder Removing the remains of the old piece was not too hard to do, except that trying to create a nice flat surface to butt the new work to was not that easy when working on a rounded surface. All told, that part of it came out successfully. Next was the hand forming a smooth radius without a lathe to make it on. About the only way I could think of was to cut a cardboard concave template and mark the ends and apply the template from time to time in the middle and hope for the best. After making a couple of cuts with the table saw to strip away the bulk of the excess. I was able to work with the jointer plane to approach a final contour, but the final work was with a hand plane and sandpaper. Ash is a hard wood and the tools had a hard time with it. Sandpapering went slowly. I was glad that I was only going to do one corner that year. That took some doing to accomplish, but at last it was done, so with a combination of glue, screws and filling to cover the joint, the new piece went into place. It seemed like it took a couple of weeks to do this fairly simple job. This and a replacement of some siding that had been giving me trouble on the "wet" side of the car took me right up to the wedding and the varnishing wasn't even complete. Since the wedding was to take place in the field behind where 1246 had rested for the past twelve years, it had to play a role in the wedding. Wedding plans included using the car as a sort of extra attraction for the guests, so it had to be as neat and clean as it could be. Since I've never been famous for a neat and tidy workspace, others were detailed to the task and by the big day all was as shipshape as could be. The router table became a sort of bar and folding chairs were brought in and worked perfectly. Pictures were posed and shot and a good time had by all. Sometimes things work out right. I had hung the doors for the saloons on modern brass plated hinges since I had none of the older style and didn't really know what they looked like. I knew that I would have trouble finding the correct style of rimlock for those doors although I knew what they ought to be from the Pullman specs and those still on the restored coach at the Lowell (Mass.) National Historic Park. The B&M must have had a special relationship with a Boston manufacturer named Sherburne since a number of items, including both outside and saloon locks were specified to be from that outfit. The outside locks were of bronze and I had one of the right type but the second was a caboose retrofit. Of course, the saloon doors were long gone along with the partitions which I had to remake a few years ago. I had pretty much decided that modern replacements would have to do or find some older latches at an antique hardware place.
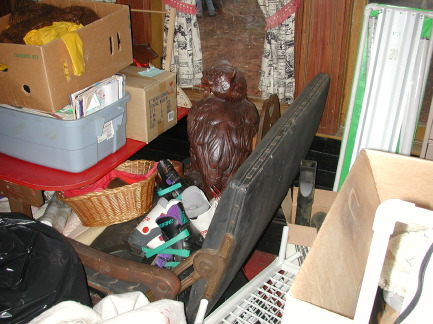
As luck would have it, another car turned up in Lunenburg, Mass. Ex-B&M 1286 a Laconia product had been sold as surplus by the B&M in the 1970s to a buyer who moved it to his property in Lunenburg. During his lifetime it was never restored and became a catchall for all kinds of stuff. Of course, it suffered from neglect over the years as well. After the death of the purchaser, his family sold the home with the car and the present owner, not a railfan, but aware of the historic interest the car possessed agreed to give it to the Old Colony and Newport, a volunteer operated scenic railroad in Newport, Rhode Island which already operated two wooden coaches.
I saw the coach interior with personnel from OC&N and noted that there were some real gems still left inside. These included a couple of correct style flip-back seats which OC&N plans to use to replicate others. The two saloons had been ripped out years ago, just as mine had, but a crude enclosure for a chemical toilet had been built in the middle of the car against some blocked off windows. By the greatest luck, the original saloon door with all hardware was taken from the women's room and reused here.
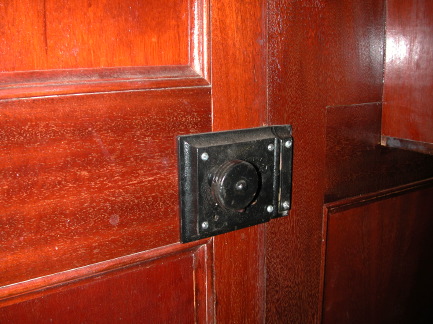
OC&N had no plans to replicate the saloons when they put 1286 into service so I begged for the door and hinges and most importantly, the latch. They graciously agreed and I took the door and hardware. I want to thank them again publicly for their generosity. I had no plans for the door itself, but I could most definitely use the hardware. After stripping the lock, I found it was a Sherburne #53 marked specially for the B&M. As such it would be keyed alike with the outside doors. The hinges, which had never been exposed to the weather, retained under layers of paint, their original japanned black finish. I was able to find a second set of the correct style hinges for the other door, but I'm still looking for another Sherburne #53. Not that I'm that hopeful.
I told you last year how I found the hoppers in Pennsylvania. This year was the time to take a closer look and make plans to put them in place. before doing that, the floors would have to be in place. There was no easier place to begin than in the saloons, a small manageable space to learn on while getting the hang of hardwood floor installation. It was getting cold and dark, late in the fall when I started out. The lighting situation was not helped by the fact that the saloons (they have nothing to do with bathing, so they're not bathrooms) have frosted glass windows and by that time I had put up the winter curtains on the outside. Mobility was an issue as well since I was working in a space roughly 3 by 5 feet. Nevertheless, I got the job done except the for shoe molding that goes around the edges. Now was the time to think about cutting the holes for the hoppers. Before doing this, I checked under the car to see what guidance I could get from whatever remained from before. There is a cute little venturi under one end that gives a clue as to where to cut the hole. Unfortunately the venturi doesn't line up with the hole in the sub-sub floor so this interesting misalignment must have created some problems for the car maintainers who had to clean up after each run. Another interesting aspect of things was the fact that the frame of the truck was under the hole. If not directly under, at least enough to cause a problem on curves, oh well.
I've spent quite a bit of time examining the original saloon walls to see if I could figure out what and where things might have been placed. The original specs mentioned only a toilet paper holder, there being no running water causing the need for towels. I was able, while prepping and varnishing to see the one surviving graffito. The simplest and most overused vulgarity in English scratched into the wall of the women's room. The men's was bare. It's time to order the southern yellow pine flooring for the main floor, take a deep breath and plunge in. |
||||||||||||||
Copyright © 1998 thru 2025, all rights reserved, contents may not be used without permission. |